Short answer
Behind the siding sits a water-resistive barrier, the flashings at every window, door, roof intersection and penetration, and the fasteners holding it all together. Siding is a rain screen, not a seal, so the barrier and the flashing details are what actually keep water out of the wall. Because none of it is visible once the last plank goes on, this is where a cheap siding job saves money.
On this page
- The drainage plane, and the one rule that governs it
- Windows and doors: the sequence is the product
- Kickout flashing, the cheapest part with the most damage behind it
- What has to be right for each siding material
- Why this is where corners get cut
- What it costs, and when to spend less
- Getting a number for your house
Siding is not waterproof and was never designed to be. It takes the first hit from wind-driven rain, sheds most of it, and lets a small amount through at butt joints, around trim, behind J-channel and at every place a fastener goes in. What keeps that water out of your framing is the layer behind the siding: the water-resistive barrier, the flashings, and the order in which they were installed.
That layer disappears the moment the siding goes up. No homeowner can inspect it afterward, and on a like-for-light replacement no town inspector sees it either. Which is exactly why it is the first thing a low bid quietly leaves out.
The drainage plane, and the one rule that governs it
The barrier behind your siding — asphalt felt, a synthetic wrap, or a fluid-applied coating — is called a water-resistive barrier, or WRB. The residential code requires one behind exterior wall covering, and it names No. 15 asphalt felt or an approved equivalent as the baseline.
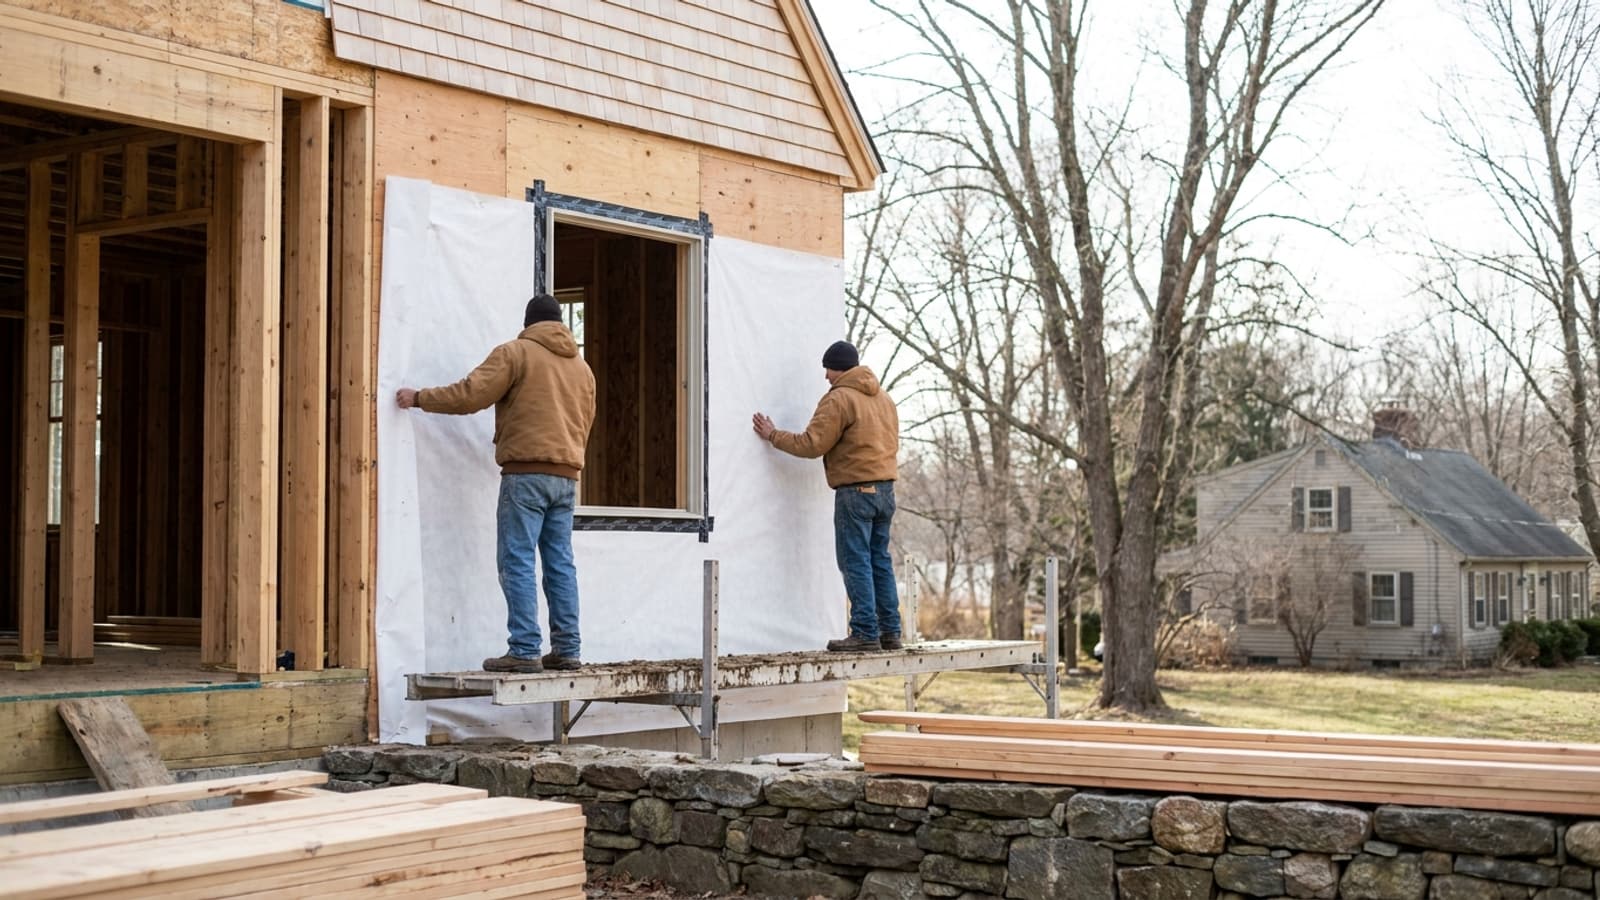
The rule that matters more than the brand is the lapping direction. Each course has to be installed so the upper piece laps over the lower piece, so water running down the face is always carried outward. Horizontal laps run at least 2 inches, vertical joints at least 6 inches. Reverse a single lap and you have built a funnel that delivers water into the sheathing instead of out onto the siding.
Where lap direction gets reversed
- Around windows, when a crew installs the wrap first, cuts a rectangle, and tapes the top of the window flange to the wrap instead of tucking the wrap over it.
- At second-floor transitions, where the lower course was hung after the upper one to make an easier reach.
- At any patch. A repair patch taped only on the bottom edge, or taped on all four sides so it cannot drain, is a common find behind failing siding.
The honest way to judge a crew on this is to look at a wall mid-job. Wrap that is tight, lapped downhill, and already flashed at the openings before any siding arrives tells you more than a brochure does.
Windows and doors: the sequence is the product
More water enters a wall at window openings than anywhere else on a typical house, and the fix is sequence, not sealant.
- Sill pan first. The bottom of the rough opening gets flashed before the window goes in, with the pan turned up at the sides and lapped out over the wrap below. Anything that leaks past the frame lands on the pan and drains out.
- Window set, jambs flashed. Flashing tape over the side flanges, running from below the sill pan level up past the head.
- Head flashing last, and tucked. The flashing over the top of the window goes under the wrap above it, not over it. On many installations a metal head flashing with an end dam is the right call.
- The sill is not caulked shut. Sealing the bottom of a window traps whatever gets in. The bottom stays open so it can drain.
That order is what separates a window that stays dry from one that stains the drywall in year three. It costs labor, not much material, and it is invisible when finished.
Kickout flashing, the cheapest part with the most damage behind it
Wherever a roof edge runs down and dies into a wall — a garage roof into the house, a porch roof, a dormer cheek — step flashing carries water down the intersection. At the bottom of that run, the water has to be thrown clear of the wall and into the gutter. That is the kickout.
Leave it out and every gallon of rain off that roof plane arrives at one narrow point of siding under pressure. The result is a predictable rot pattern: soft sheathing in a vertical stripe below the roof edge, staining inside on the same wall, and often framing damage before any siding looks wrong from the driveway. The residential code requires flashing at roof-to-wall intersections, and current editions call out a kickout at the lower end of the step flashing.
A kickout is a small piece of metal. Correcting the rot it prevents is a four-figure repair.
What has to be right for each siding material
| Detail | Vinyl | James Hardie fiber cement | Cedar |
|---|---|---|---|
| DetailFastening | VinylNailed in the center of the slot, not driven tight, so panels can move with temperature | James Hardie fiber cementBlind-nailed per the published pattern, into studs or sheathing as specified | CedarFastened to allow movement, one fastener per bearing on bevel siding |
| DetailGap at flashing | VinylPanels drain into J-channel, which stays clear | James Hardie fiber cementLeave the specified gap above horizontal flashing and do not caulk it | CedarLeave the head flashing free to drain |
| DetailGround and roof clearance | VinylKeep starter above grade | James Hardie fiber cementClearances from grade and roofline are part of the install instructions | CedarClearance plus back-priming on cut ends |
| DetailFasteners on the shoreline | VinylCorrosion-resistant | James Hardie fiber cementCorrosion-resistant | CedarStainless is the safe choice near salt air |
The pattern is the same across all three: gaps that look unfinished are usually doing a job. Caulking a Hardie plank tight to a window head flashing, or sealing the bottom of a vinyl course, closes the drainage path the manufacturer designed in. We install all three and the install instructions differ, which is why a crew that only ever hangs one material tends to hang the others the same way. You can read how each system is detailed on our siding page.
Salt air changes the fastener conversation
On the central shoreline, salt accelerates corrosion of metal flashing and fasteners more than it damages the cladding. A galvanized nail that would last decades inland can bleed rust through a paint finish in a few seasons. This is a real cost difference on homes in Guilford and Madison, and it belongs on the estimate rather than being discovered later.
Why this is where corners get cut
Three things line up to make the barrier and flashing the easiest place to save money.
It is invisible. Nobody photographs a finished wall and sees the wrap.
It is usually unpermitted. Most Connecticut towns we serve do not require a permit for a like-for-like siding replacement, so no third party looks at the wall before it is covered. A permit generally becomes necessary once sheathing gets replaced, exterior insulation is added, or an opening changes — which means the jobs with the most hidden work are sometimes the only ones inspected.
It shows up years later. Reversed laps and a missing kickout do not leak on day one. They leak after enough wind-driven rain to saturate a spot, and by then the crew is gone.
The practical defense is a written scope. Ask for the barrier named by product, the lap dimensions, sill pan and head flashing at every opening, kickout flashing at each roof-wall intersection, and fastener type. A quote that lists square footage and a color and nothing else is not a quote you can compare.
What it costs, and when to spend less
General Connecticut ranges depend heavily on the house: vinyl runs roughly $8,000 to $35,000, James Hardie fiber cement $18,000 to $80,000 or more, and cedar $25,000 to $60,000 or more. Wall area, trim complexity and what is found behind the old siding drive the number more than the material name does.
The case against spending more is worth naming. If your existing siding is simply dated or chalky and the wall behind it is dry, you are buying appearance, and there is no urgency to it. Our post on how to tell when siding has failed walks through the difference between cosmetic aging and water in the wall. And on a home with generous overhangs and sound flashing, adding a drainage gap or exterior insulation may deliver less than simply doing the flashing correctly with the material you already planned to use.
Where the money is almost always well spent is sheathing repair and window flashing. Those are one-time-access items. Once siding is on, redoing them means taking it off.
Getting a number for your house
Our siding process includes removing the old cladding, inspecting the sheathing, and installing the moisture barrier and flashings before the new siding goes up, because that sequence is the only one that works. If you want a written price, someone comes out, measures the walls, looks at the openings and roof intersections, and gives you an itemized figure. Start at get an estimate or call the office during business hours.